
Intro
Learn how to safely remove sutures at home with our easy-to-follow guide. Discover the 5 simple methods to dissolve or cut sutures, including the use of suture removers, tweezers, and antibiotic ointment. Say goodbye to doctors visits and hello to convenient self-care, while minimizing scarring and promoting healthy wound healing.
Removing sutures at home can be a daunting task, but with the right guidance, it can be done safely and effectively. Sutures, also known as stitches, are used to close wounds or incisions, and removing them is an essential part of the healing process. While it's always best to consult a medical professional for suture removal, there are situations where you may need to remove sutures at home. In this article, we'll explore five easy ways to remove sutures at home, along with some essential tips and precautions.
Understanding Sutures and Suture Removal
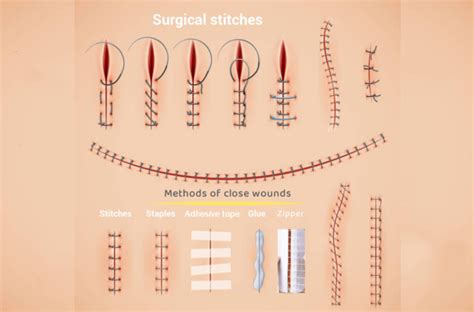
Before we dive into the methods of removing sutures at home, it's essential to understand the basics of sutures and suture removal. Sutures are typically made of a sterile, biocompatible material, such as nylon or polypropylene, and are used to close wounds or incisions. There are two types of sutures: absorbable and non-absorbable. Absorbable sutures dissolve on their own, while non-absorbable sutures need to be removed.
Suture removal is usually done 7-14 days after the sutures are placed, depending on the type of wound or incision. It's essential to follow proper suture removal techniques to avoid infection, scarring, or other complications.
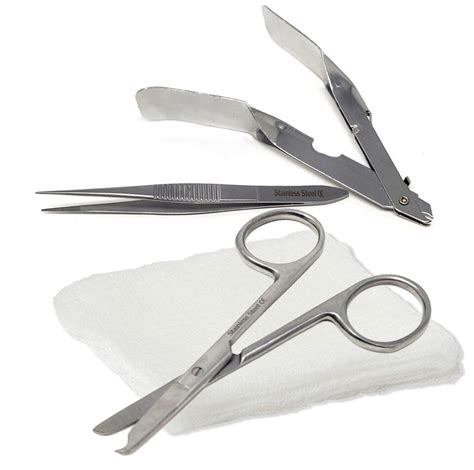
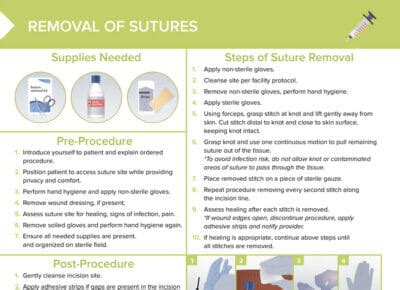
Method 1: Using Suture Removal Scissors and Forceps
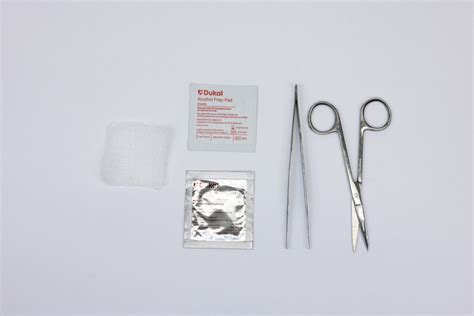
This is the most common method of removing sutures at home. You'll need suture removal scissors and forceps, which can be purchased at a medical supply store or online.
- Wash your hands thoroughly with soap and water.
- Clean the area around the sutures with soap and water.
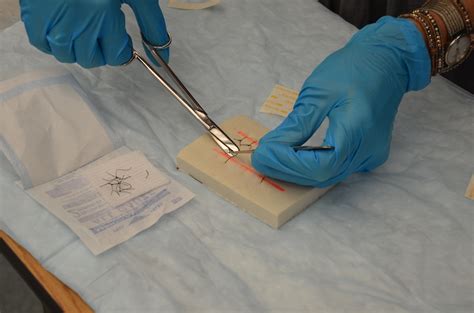
- Grasp the suture with the forceps and gently pull it away from the skin.
- Use the suture removal scissors to cut the suture as close to the skin as possible.
- Remove the suture and repeat the process for each suture.
Precautions:**
- Make sure to clean and dry the area thoroughly before and after suture removal.
- Avoid pulling the suture too hard, as this can cause bleeding or scarring.
- If you experience any pain or discomfort during suture removal, stop immediately and consult a medical professional.
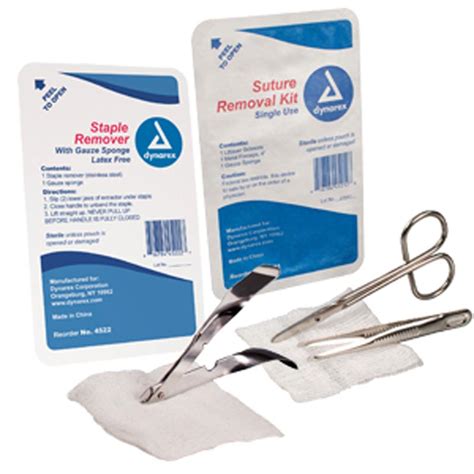
Method 2: Using a Suture Removal Kit
A suture removal kit is a convenient and easy-to-use tool that includes everything you need to remove sutures at home.
- Follow the instructions provided with the kit.
- Clean the area around the sutures with soap and water.
- Use the kit's suture removal tool to gently pull the suture away from the skin.
- Cut the suture as close to the skin as possible using the kit's scissors.
- Remove the suture and repeat the process for each suture.
Tips:**
- Make sure to follow the instructions provided with the kit carefully.
- Use the kit's suture removal tool to avoid pulling the suture too hard.
Method 3: Using a Suture Removal Solution
A suture removal solution is a liquid or gel that helps to loosen and remove sutures.
- Apply the solution to the sutures and surrounding area.
- Gently massage the area to help loosen the sutures.
- Use suture removal scissors to cut the suture as close to the skin as possible.
- Remove the suture and repeat the process for each suture.
Precautions:**
- Make sure to follow the instructions provided with the solution carefully.
- Avoid using the solution on sensitive skin or open wounds.
Method 4: Using a Suture Removal Tool with a Magnifying Glass
A suture removal tool with a magnifying glass can help to make the process easier and more accurate.
- Use the magnifying glass to locate the sutures.
- Use the suture removal tool to gently pull the suture away from the skin.
- Cut the suture as close to the skin as possible using suture removal scissors.
- Remove the suture and repeat the process for each suture.
Tips:**
- Make sure to use the magnifying glass to locate the sutures accurately.
- Use the suture removal tool to avoid pulling the suture too hard.
Method 5: Using a Suture Removal Applicator
A suture removal applicator is a small device that helps to remove sutures quickly and easily.
- Place the applicator on the suture.
- Gently squeeze the applicator to loosen the suture.
- Remove the suture and repeat the process for each suture.
Precautions:**
- Make sure to follow the instructions provided with the applicator carefully.
- Avoid using the applicator on sensitive skin or open wounds.
Frequently Asked Questions
What are the risks of removing sutures at home?
+The risks of removing sutures at home include infection, scarring, and bleeding. It's essential to follow proper suture removal techniques and take necessary precautions to avoid these complications.
How do I know if I need to remove my sutures?
+You should remove your sutures according to your doctor's instructions or when they become loose or start to come out on their own. If you're unsure, consult your doctor or a medical professional.
Can I remove my sutures if I have sensitive skin?
+If you have sensitive skin, it's best to consult a medical professional for suture removal. They can provide guidance on the best methods and techniques for removing sutures on sensitive skin.
Final Thoughts
Removing sutures at home can be a convenient and easy process, but it's essential to follow proper techniques and take necessary precautions to avoid complications. By following the methods outlined in this article, you can safely and effectively remove your sutures at home. However, if you're unsure or have any concerns, it's always best to consult a medical professional for guidance.